A home energy audit is a detailed assessment of energy consumption within a residence. It identifies inefficiencies such as air leaks, insulation gaps, and outdated equipment that drive up utility bills. Whether performed by a homeowner or a trained auditor, this evaluation lays the groundwork for targeted improvements that enhance comfort, safety, and overall sustainability. By pinpointing areas of heat and energy loss, a thorough audit becomes the first step toward healthier finances and a greener lifestyle.
Regular audits can lead to substantial cost and energy savings, protecting both wallet and environment. Learn when to perform a DIY check, when professional expertise is worthwhile, and how to interpret results to prioritize upgrades. This guide will walk you through every stage, from initial inspection to final report analysis, so you can take confident action against energy waste and transform your home into an efficient haven.
Introduction to Home Energy Audits
A home energy audit is defined as a systematic process that measures and evaluates how energy flows through your house. Using visual inspections and simple diagnostic tools, you can detect sources of waste and inefficiency in heating, cooling, insulation, and appliances. Audits not only highlight problem areas but provide an estimate of potential energy and cost savings, making it easier to justify and plan improvements.
Key benefits include pinpointing high-usage zones—often heating and cooling systems—and uncovering hidden vulnerabilities such as moisture-related mold risks. A DIY audit can be completed in a couple of hours at no charge, while a professional audit may require a 2–4 hour visit and specialized equipment at a cost of up to $900, although many utilities offer subsidies. Indicators for scheduling an audit include rising bills, recent home purchases, or planning major upgrades like solar panels or an electric vehicle charger.
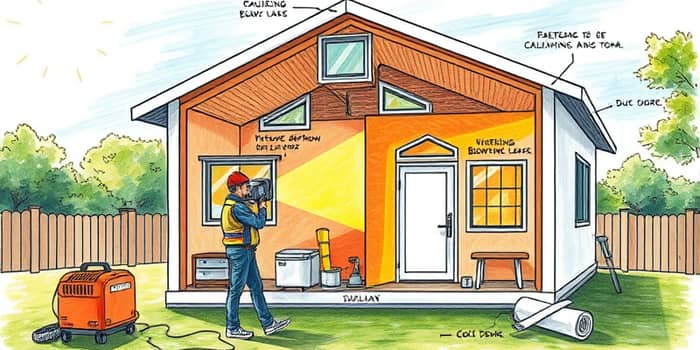
DIY Home Energy Audit Steps
Conducting a basic audit on your own requires an audit kit, a thermometer, incense sticks for detecting drafts, and copies of your recent utility bills. Follow this clear, five-step approach to identify and address the most common leaky spots.
- Gather tools and documents: Collect utility bills, home blueprints or floor plans, and list specific concerns.
- Exterior inspection: Walk the perimeter to check siding, roofing, foundation, windows, doors, vents, and drainage for visible gaps.
- Windows and doors: Use your hand or an incense stick to check windows and doors for leaks; seal gaps with caulk and apply weatherstripping.
- Insulation check: Examine the attic, wall cavities, and crawl spaces for missing or compressed insulation and measure current R-values.
- HVAC and ducts: Replace filters, insulate ductwork in unconditioned areas, and verify that registers are unobstructed.
- Lighting and appliances: Swap incandescent bulbs for LEDs, unplug devices left in standby mode, and evaluate appliance age and performance.
- Locate air leaks: Test outlets, plumbing penetrations, and attic access hatches with an incense stick or infrared thermometer.
- Water heater optimization: Set temperature to 120°F and wrap the tank and exposed hot water piping with insulation.
- Monitor usage: Compare your bills over 12 months and consider installing a smart meter for real-time feedback.
- Room-by-room review: Walk through each room to note differences in temperature, humidity, and comfort levels.
Professional Home Energy Audit Process
A professional auditor adds precision to your inspection by using specialized equipment and in-depth testing protocols. Their comprehensive analysis typically begins with a homeowner interview to discuss habits, concerns, and historical energy data. This stage ensures that the auditor tailors the assessment to your home’s unique characteristics.
After testing, you will receive a personalized report that outlines current consumption patterns, prioritizes recommended measures—such as sealing leaks, upgrading insulation, and replacing aging equipment—and provides detailed savings estimates with projected return on investment. Armed with this information, you can confidently plan upgrades that deliver maximum impact for your budget.
Identifying and Fixing Costly Leaks
Most homes suffer from a few predictable problem areas where heat and air escape. In cold climates, these leaks force heating systems to work harder, while in warmer regions they drive up cooling costs. Targeting these sources first delivers the fastest payback and the best value for your investment.
The primary culprits of energy waste typically include windows, doors, plumbing penetrations, and attic hatches. Duct leaks alone can waste 20–40% of heating and cooling energy. By sealing these vulnerabilities, you can transform your home’s performance almost immediately.
- Seal visible cracks and gaps around windows and doors with high-quality caulk or spray foam.
- Install weatherstripping on moving parts like door bottoms and window sashes.
- Place insulated gaskets behind outlet and switch plates on exterior walls.
- Wrap and seal duct joints and seams, especially in unconditioned attics or crawl spaces.
- Upgrade to a programmable or smart thermostat to reduce runtime during unoccupied periods.
- Replace outdated light bulbs with efficient LED fixtures for immediate wattage savings.
Preparation and Making the Most of Your Report
Before your audit, clear storage from the attic, basement, and around the HVAC system so the auditor can easily access all areas. Gather past utility bills and photographs of any areas you suspect may have problems. Document any comfort complaints or safety concerns you have noticed to streamline the evaluation process.
When you receive the report, it will include an executive summary, a breakdown of consumption by system, and prioritized action items. Review estimated savings and payback periods to decide which measures to implement first. Remember that many utilities offer rebates or financing for recommended upgrades, so check available incentives before scheduling work.
Savings and Incentives
Implementing recommended measures often yields a typical bill reduction of ten to thirty percent, depending on home size, climate zone, and existing conditions. Sealing air leaks and improving insulation deliver immediate benefits, while equipment upgrades like high-efficiency furnaces or heat pumps provide long-term gains.
To offset costs, explore local and federal programs that offer rebates on audits, insulation, HVAC systems, and renewable energy installations. Combining an energy audit with a solar PV or heat pump installation amplifies savings and reduces your carbon footprint. Always consult your utility or government website for the latest incentive details.
Key Takeaways
- Prioritize sealing air leaks for immediate comfort improvements.
- Insulate attics and walls to reduce heat transfer.
- Consider a professional audit for comprehensive insights.
- Use report recommendations to plan cost-effective upgrades.
- Leverage available rebates and incentives to offset costs.
References
- https://www.sunrun.com/knowledge-center/how-to-conduct-a-home-energy-audit
- https://www.gba.org/resources/green-building-methods/processes/energy-audits/
- https://www.rogersinsulation.com/a-homeowners-guide-to-energy-audits-what-to-expect-and-how-to-maximize-your-audits-value/
- https://epb.com/get-connected/energy-tips/how-to-do-home-energy-audit/
- https://www.youtube.com/watch?v=hDhSPZXu-ew
- https://www.energy.gov/energysaver/do-it-yourself-home-energy-assessments
- https://homes.rewiringamerica.org/projects/energy-audit-homeowner
- https://www.apge.com/blog/how-to-perform-a-diy-home-energy-audit